One project I’m working on is an external API where users can copy their API token, refresh their API token, and read and test API documentation.
Django is fast, efficient, and with AWS Elastic Beanstalk, easy to deploy. After looking at libraries and other resources to build this API, we found that Django REST Framework (DRF) would suit our needs and be a one stop for 1) Token authentication, 2) Creating easy API endpoints/views and 3) Generating documentation. Below is a quick recap and high level overview in creating an API using DRF.
Setting up your Django project
Creating a new Django project is pretty easy. Let’s call our app maddysapi .
After installing Python, Django and creating a virtual environment, create your new Django project:
django-admin startproject maddysapi
pip install djangorestframework
Add a new app, we’ll call it ‘api’:
django-admin.py startapp api
To use DRF, in maddysapi/settings.py , be sure to add rest_framework to your apps:
INSTALLED_APPS = [
  'django.contrib.admin',
  'django.contrib.auth',
  'django.contrib.contenttypes',
  'django.contrib.sessions',
  'django.contrib.messages',
  'django.contrib.staticfiles',
  'rest_framework',
  'maddysapi.api'
]
After migrating your database python manage.py migrate , create a test view:
maddysapi/api/views.py:
from rest_framework.response import Response
from rest_framework.decorators import api_view

@api_view(['GET', ])
def test_endpoint(request):
    return Response({"message": "This is a test response!"})
maddysapi/urls.py:
from django.conf.urls import url
from maddysapi.api import views

urlpatterns = [
     url(r'^api/v1/test-endpoint/', views.test_endpoint)
]
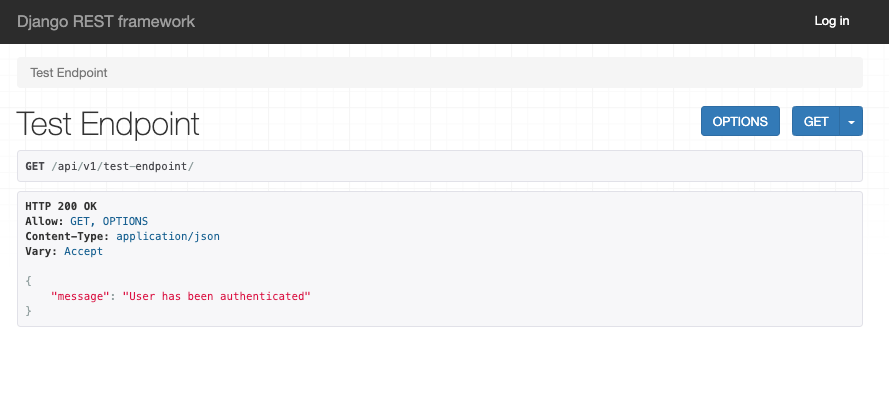
With DRF, you can consume your new endpoint via the browser:
 127.0.0.1:800/api/v1/test-endpoint
To test your endpoint, you can also send a request, like the Python one below:
import requests

url = "http://127.0.0.1:8000/api/v1/test-endpoint/"

headers = {
'Content-Type': 'application/json'
}

response = requests.request("GET", url, headers=headers)
print(response.text.encode('utf8'))
After confirming your test endpoint works as expected, we can now add token authentication — also using DRF!
maddysapi/api/views.py:
from rest_framework.response import Response
from rest_framework.decorators import api_view
from rest_framework.permissions import IsAuthenticated # <-- ADD

@api_view(['GET', ])
@permission_classes([IsAuthenticated, ]) # <-- ADD
def test_endpoint(request):
    return Response({"message": "This is a test response!"})
Sidenote: You’ll notice I’ve opted to use decorators (@apiview & @permissionclasses) and function based views instead of class-based views. The latter would look like:
from rest_framework.views import APIView
from rest_framework.response import Response
from rest_framework.permissions import IsAuthenticated

class TestEndpoint(APIView):
    permission_classes = (IsAuthenticated)

    def get(self, request):
        return Response({"message": "This is a test response!"})
When we test the endpoint again, we’ll get the following response:
{
   "detail": "Authentication credentials were not provided."
}
That’s because our view is looking for the API token in order to access the endpoint.
Implementing Token Auth
Let’s revisit your settings.py
INSTALLED_APPS = [
  'django.contrib.admin',
  'django.contrib.auth',
  'django.contrib.contenttypes',
  'django.contrib.sessions',
  'django.contrib.messages',
  'django.contrib.staticfiles',
  'rest_framework',
  'rest_framework.authtoken' # <-- ADD THIS
  'maddysapi.api'
]

## ADD THIS BELOW:
REST_FRAMEWORK = {
  'DEFAULT_AUTHENTICATION_CLASSES': [
     'rest_framework.authentication.TokenAuthentication',
  ],
}
And then, again migrate python manage.py migrate
This will create a authtoken_token table with fields key, created, user_id .
Create a superuser (this will give you admin access):
python manage.py createsuperuser --username maddy --email maddy@test.comAfter successfully creating your user, you can manually generate a token:
python manage.py drf_create_token maddyThis will return a string (the key) which your user will use to authenticate the API.
We can now update our request to include our Token in the header. Note, the request’s header should be formatted as such:
Authorization: Token <token>Our request (below) will now successfully return data:
import requests

url = "http://127.0.0.1:8000/api/v1/test-endpoint/"
payload  = {}
headers = {
  'Authorization': 'Token ba9821207dbf4036842f2fb4465deb999c200422'
}

response = requests.request("GET", url, headers=headers, data = payload)
print(response.text.encode('utf8'))
// {"message": "This is a test response!"}
Your endpoint is now token authenticated!
We covered:
- Setting up a basic Django app
- Writing an API endpoint
- Adding token authentication to our users
- Adding token authentication to our API endpoint
Next up, we’ll look at refreshing tokens and generating documentation!


